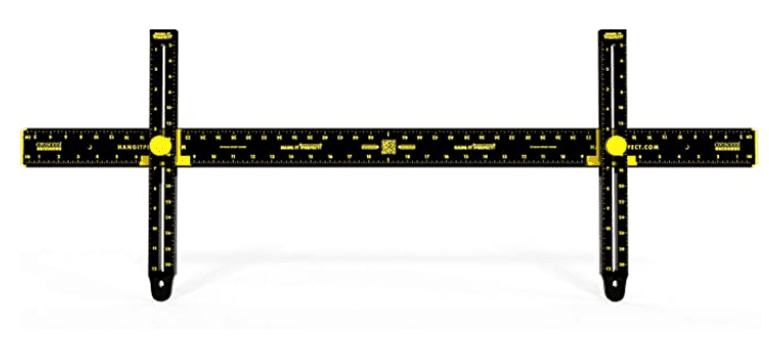
The Art of Hanging Art

Home Office Interior Design with big desk and traditional design

Over the course of my interior design career, I must have hung over a thousand pieces of art.  Hanging art around a room sounds like such an easy task, but most people hang art incorrectly. So, let’s take a minute and review some easy steps to hanging art.

First things first: SPOT THE ART

The first thing you need to do is “spot” the piece or grouping. That is holding the piece up and having someone else look at the height and left-to-right spacing on the wall. Maybe someone else is holding it and you are the one giving it the eye-approval. Typically this is a two-person task just to have an eye looking at the full space. 

As a note, you want the focal point of the art to be at eye level or just above so you are looking straight at the art.

Most people hang art too high. You will rarely want to be looking up at a piece of art. Read on as there are exceptions to that rule however.

When you have your location set, make a small line left to right at the center of the piece using a pencil. This line needs to be dark enough to see it for measuring, but light enough so you can erase it.

Step Two: MEASURE THESE THREE THINGS

  1. Measure from the ceiling to the line you just made on the wall. 
  2. Measure from the top of the art to the hardware on the back of the piece.
  3. If there are two pieces of hardware, measure between the left and right hardware on the back of the piece.

A Few Notes About Measuring & Hardware

You may have two D-Rings on the sides or a couple of Saw Tooth Hooks at the top. Take a measurement from the top of the piece of art to the spot on the hook that the nail or hook will grab for your hardware. Be aware that the left and the right side may have different measurements, so check both sides.

types of picture hanging tools

Step Three: PLACEMENT OF THE NAIL OR SCREW

It’s important to note that the spot where you will install the nail is not where you have measured the hook to be. The nail should be installed so the hook is at the point you have measured.  That could vary up to about ½ an inch, so be careful!

Unless the art is very heavy, typical nails provided with a picture hanging hook should be just fine to hold most pieces.

Always double check your piece is level with a picture level as sometimes what looks right can be off enough to drive you crazy each time you look at the piece.

A Few Exceptions to The Rule of Height

Wall art collage

I noted that art should always be hung so the focal point is at eye level. I have a few exceptions to this rule:

  • Photo galleries with multiple pieces
  • Art galleries or pieces that are hung above a sofa or the headboard of a bed
  • A grouping of two or more where the pieces are staggered
  • A very large piece of art that may take up the majority of a wall

So how do you hang these types of items?  Well, there are many variations for these items and it is very challenging to specify a blanket solution in a blog without seeing the art and the space, but here are some general guidelines to get you started:

  • Galleries should be installed so the center of the gallery is at eye level or slightly higher.  
  • If you are hanging art above a sofa, leave approximately 12″ clearance minimum depending on the height of the piece of art. 
  • Art over a headboard should be centered on the wall space between the headboard and the ceiling, provided the ceiling isn’t higher than 8′.  For 9′ or higher, “attach” the art so it sits approximately 9-12″ above the headboard leaving the excess space above the art.

Aside from these exceptions, if you are just looking to hang up one piece of art on a wall, keep it at eye level. At first you may feel that this is too low because you have seen so many pieces hung too high. Once you are used to it, you will find that you are getting more enjoyment out of your art as you can actually see it!

Great Related Finds


Perfect Pro Picture

Crescent Creative Products Perfect Pro Picture Frame Wall Hanging Tool with Level, 36 inch, Black from Amazon

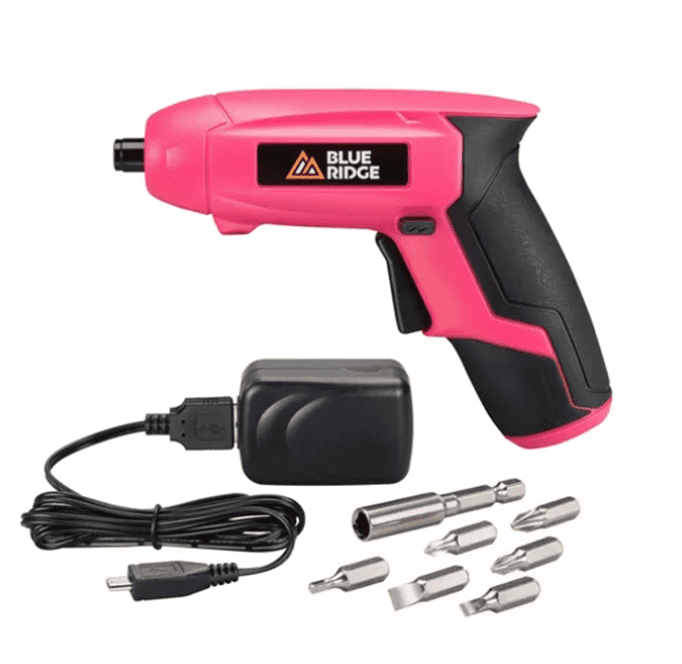
Blue Ridge Tools Rechargeable Screwdriver

Electric screwdriver with interchangeable bits and driver heads. Perfect for any task!

picture hanging tool


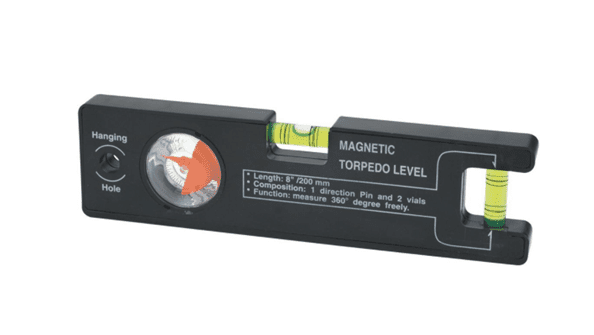
Magnetic Torpedo Level

This multi-directional level comes with a handy magnet to attach firmly to art frames while eyeing for placement.

Share this post

For access to portfolio, please join my email list